Security Roles control the level of access each user has to the system.
Security Roles and the security functions within have been appropriately defined based on your sites requirements.
You can determine what your assigned Security Role is by viewing the bottom ribbon of Corvus Axiom:

Corvus Administrators can review the Security Roles and the associated security functions to assist with determining what Security Role assignment should be bound to a user.
- Security Functions can be found via the Data Administration Tab, ensure Personnel / Security is selected and click Security Functions:

Please note, you will not have access to unticking or ticking on any Security Functions, if you believe there is something missing please contact Intov8 Support at support@intov8.com.au.
Default Security Access for First Time Users
Once the application has been installed for the first time, Corvus New Log On will be the defaulted Security Role. This will restrict all access, it is the Site Administrators responsibility to delegate the appropriate Security Role, depending on what the user’s access requirements will be. The instance of Corvus will load, however the user will not have access to any functionality:

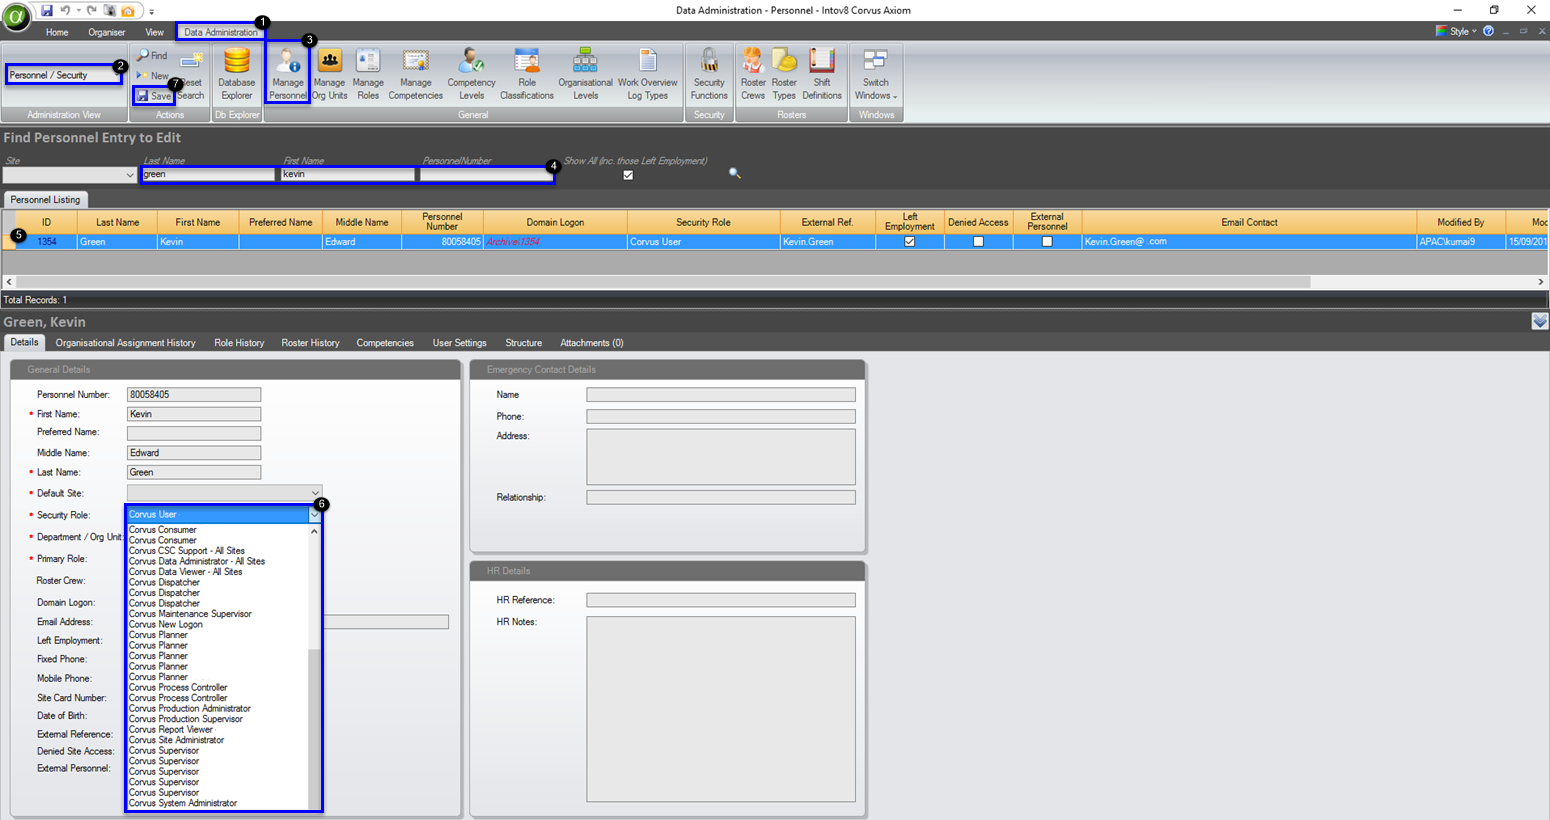
Editing Security Access for First Time Users
- Select the Data Administration tab
- Ensure Personnel / Security is selected
- Select Manage Personnel
- Search the existing user, search all or part of the appropriate users Last Name, First Name or Personnel Number
- Select the appropriate personnel record
- Using the Security Role drop down menu select the required Security Role
- Select Save
- Please note: the user will have to close and reopen Corvus in order for these changes to take effect.
Dashboard Access
This can be done two ways, the user can update their own access via Corvus Dashboards or an Administrator can update their access via the Corvus Manage Personnel module.
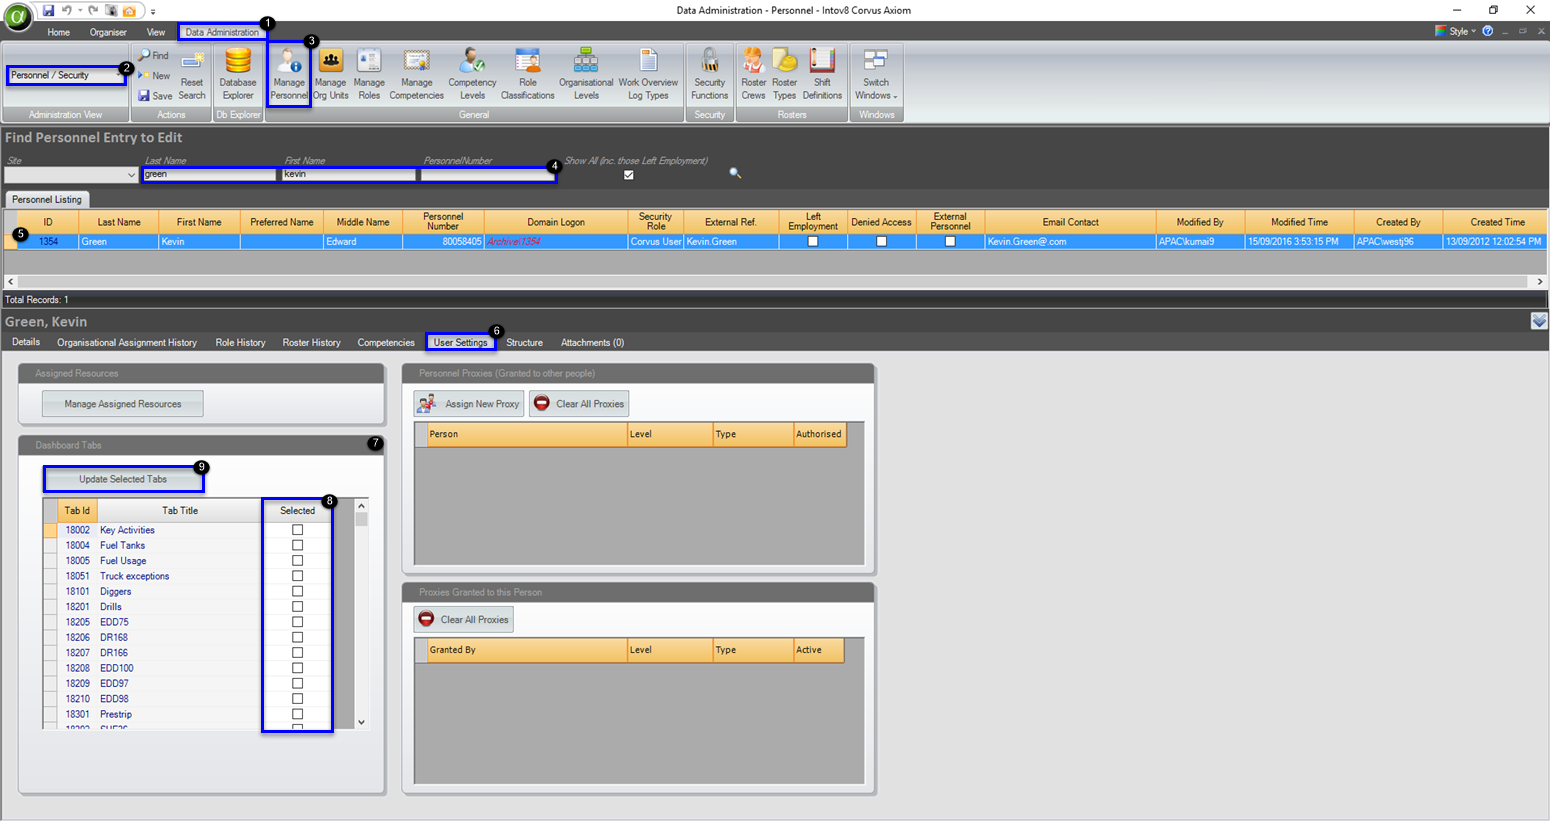
To Change Dashboard Access via Corvus Axiom
- Select the Data Administration Tab (Note: This will only be visible to Corvus Site Administrators – based on the security role)
- Ensure Personnel / Security is selected from the drop down
- Select the Manage Personnel module
- You can search by Last Name, First Name or Personnel Number
- Select the personnel record
- Select the User Settings tab (available within the Personnel Record options)
- Dashboard Tabs can be edited in this section of the User Settings tab
- Tick or Untick to select the Dashboard Tabs that will be displayed to the user
- Select the Update Selected Tabs button (as opposed to the Save button)
- Please note: If the user has Corvus Dashboards open as these changes are made, they will be required to exit and reopen the Dashboards in order to pick up their newly allocated Dashboard tabs
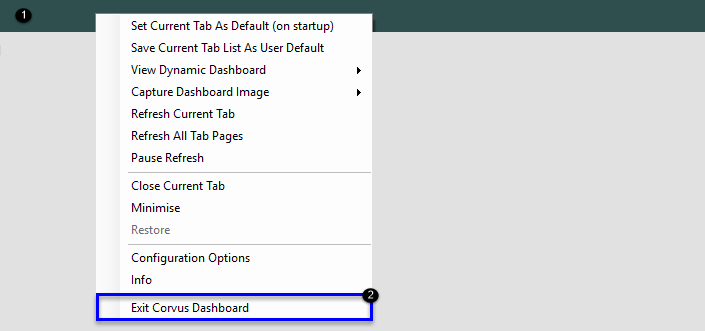
[How to Exit Corvus Dashboards
In order to exit Corvus Dashboards follow the below steps:
- Right click on the dashboard (nearest to the top ribbon)
- Select Exit Corvus Dashboard
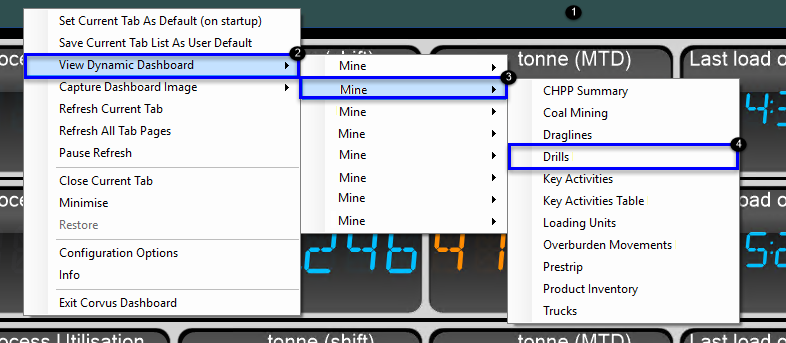
To Change Dashboard Access via Corvus Dashboards
- Right click on the Dashboard (nearest to the top ribbon)
- Select View Dynamic Dashboard
- Select the applicable Site
- Select the appropriate Dashboard Tab/s
- The selected Dashboard Tab will display as per below (with a lightning bolt, this signifies the tab has not been saved as your default and upon relaunch of the application the tab will be removed)
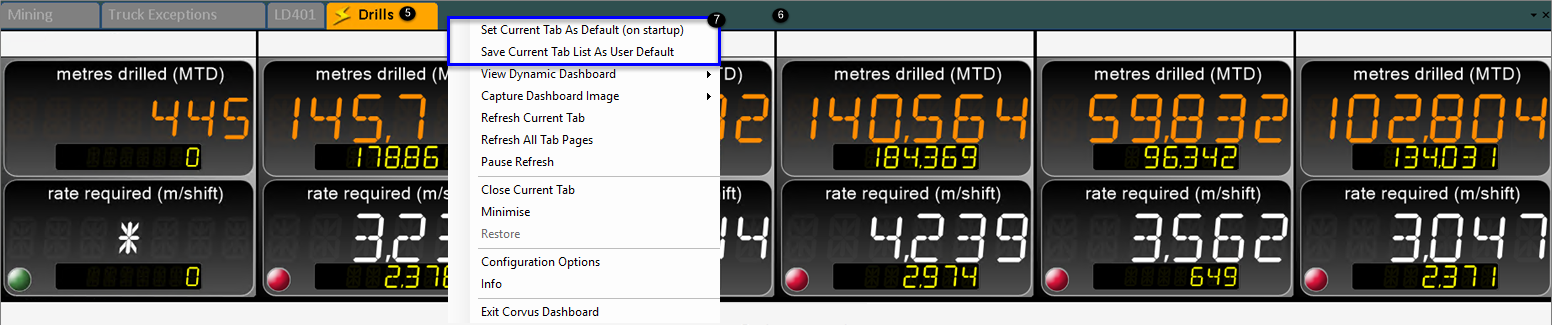
- To save the newly allocated dashboard tabs the user will be required to:
Right Click on the Dashboard (nearest to the top ribbon)
Select Set Current Tab As Default (on startup) or Save Current Tab
List As User Default
- The lightning bolt should now be removed and the allocated dashboard tabs should now be available and display as per below:
